Introduction

measure diagram  three stick figues belt size shows a dashed line around the waist, second title is cane length shows a line with arrow ach end from floor to shoulder, 3 three dots at the waist and dotted line down to the surface with a line with two arrows perpendicular to the child with title arc width
Belt size: Circle measuring tape taut around the waist; TIP: Avoid measuring over bulky clothing; cane length Use a measuring tool to obtain length    TIP: Measure height floor to shoulder; cane length Place a ruler at the waist horizontally tip: Count whole number of inches hip to hip

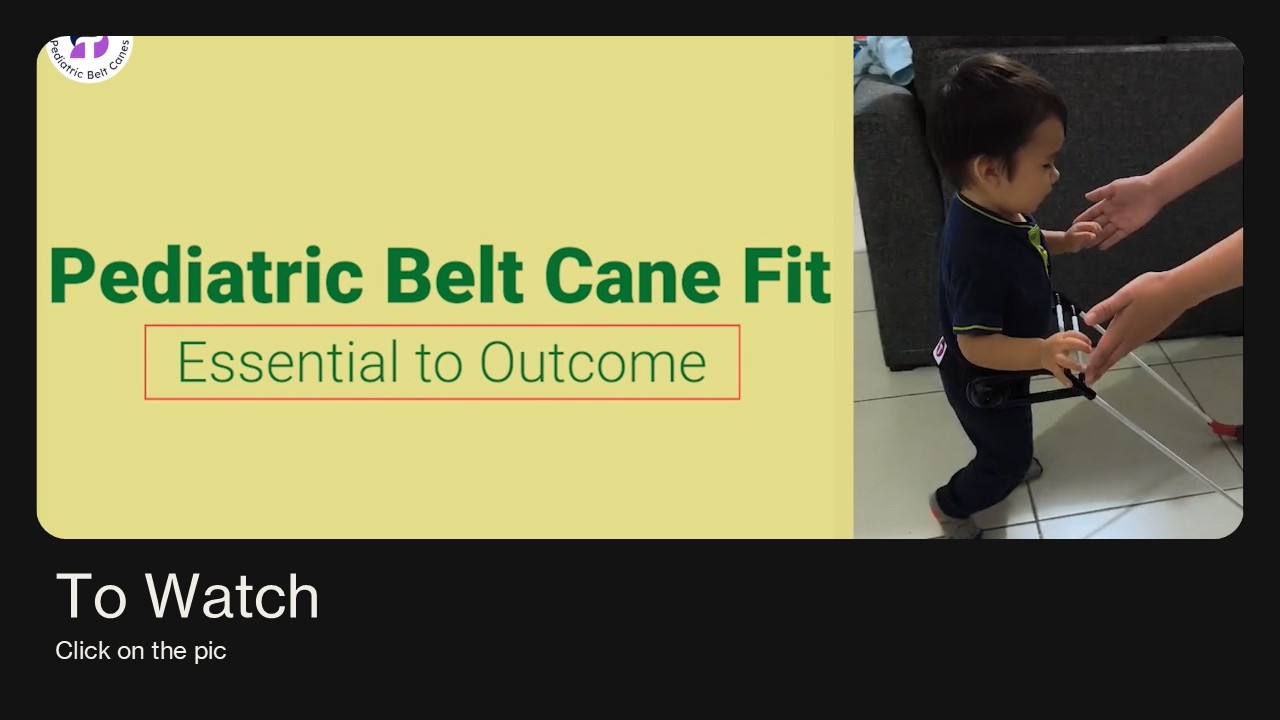
Watch How to Fit a Pediatric Belt Cane

video title pediatric belt cane fit essential to outcome shows a 1-year-old wearing a belt cane and mom's hands nearby him
Measuring for the Pediatric Belt Cane The fit of the Pediatric Belt Cane needs to be exact on day one.  Make sure the child is standing up and bearing weight when taking the measurements. The belt size and cane arc width are both measurements are taken at the same place on the child's waist – at the belt loops. The frame length is measured floor to top of the child's shoulder.
Arc Width Purpose: The frame's arc width match's the width of the child at the waist. Ask the child to stand in a comfortable, upright position, with feet together and bearing weight. Using a caliper, wooden/plastic ruler, or metal measuring tape, measure the inches from hip to hip. Place the measuring tool across the part of the hips where waist circumference is measured. Record the measurement in inches. For instance, the picture indicates “size 6”. Double check the measurement to minimize error. Accuracy here will ensure the frame is neither too narrow nor too wide.
Belt Size Purpose: The belt secures the cane frame to the child, a snug fit is essential for both stability and comfort. Tips to obtain the belt size measure the waist circumference of the child. Ask the child to stand in a comfortable, upright position, with feet together and bearing weight.  Using a measuring tape wrap it around the child's waistline. Pull the tape snug but not so tight it causes the skin to indent/wrinkle. Make sure measuring tape is level all the way around and no fingers are between the child and the measuring tape. Record the circumference in inches. For instance, the picture indicates a waist size of 19.3 inches. Report a 19in waist circumference. Little kid belt sizes begin at 17 inches and increase in one-inch increments up to a waist circumference of 25 inches. Above 25 inches is considered a Big Kid Belt Cane.
Cane Length Purpose: Correct frame length provides a 2-step preview. To measure cane length, start by having the child bear weight and stand erect. Use a measuring tape to measure from the floor to the top of the child's shoulder. Make sure the measuring tape is pulled taut and parallel to the child for an accurate measurement.
When a child is unable to stand Measuring while the child is lying down can make it difficult to get an accurate size/fit. It helps if you are able to position the child flat on the floor, square shoulders, and both legs straight with feet flexed. When child is in a wheelchair use a rod or metal measuring tape to ensure the line from the shoulder to the floor is straight and lands on the floor just ahead of the toe of the footrest for sufficient preview.
Selecting and Evaluating the Cane Frame Standard Cane Frame The standard cane frame extends two steps ahead of the child, providing sufficient reaction distance/time for obstacles and surface changes. The tips of the cane frame should touch the ground two steps in front of the child. The omni wheel tips should contact the ground. The horizontal rod that connects the cane tips should be approximately one inch off the ground. If the cane frame is shorter, as shown below, it will not function properly and the child will not have ample reaction distance/time to drop-offs or surface changes, increasing the risk of accidents.
Specialty Cane Frame Specialty cane frames are shorter, extending just 1 1/2 steps ahead. These are recommended for indoor, familiar environments as long as they do not contain stairs/drop offs since they provide less reaction time. Use specialty cane frames in controlled settings, such as familiar classrooms or therapy rooms, where environmental risks are minimal. This frame has been shown to aid the motor impaired walker in school and home settings.
Evaluating the Belt Cane Fit Correct The belt fits correctly when the logo covers half of the catch pad Magnets click easily into magnet ports The elastic is not stretched when standing still The logo can be worn in front or back Top of the black handles are horizontal to the surface.
Belt is Too Large If the logo reaches past the fastener just to be snug on the waist, the belt is too large. Elastic stretches to connect to the frame, compromising comfort and security. When the fastener is closed correctly, the belt fits loosely, causing the it to slip and turn with typical usage.

Belt is Too Small If the belt barely catches the fastener or is unable to reach it at all, it is too small. The child may report discomfort or the belt may leave marks or indentations on the waist. Magnet ports do not engage securely, and pop off easily.
Cane Frame Length Frame too long handle points upward. Frame too short handle points downward.

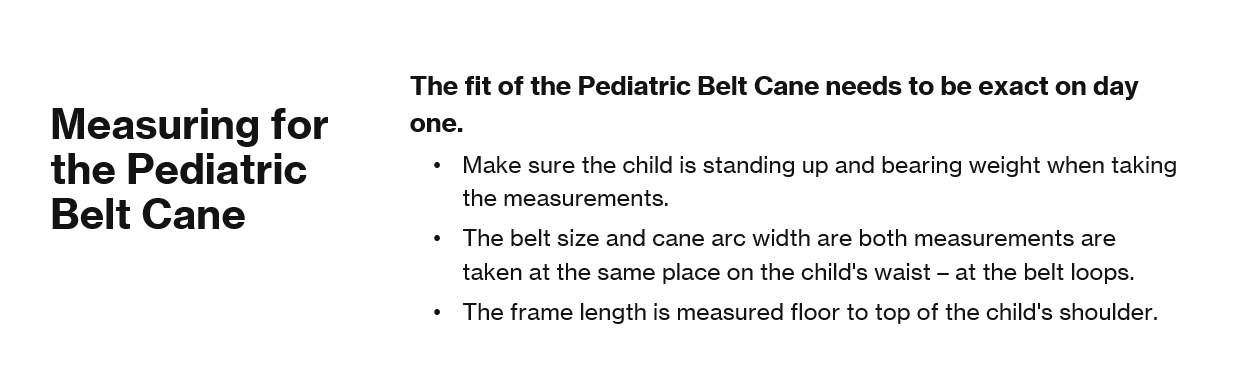
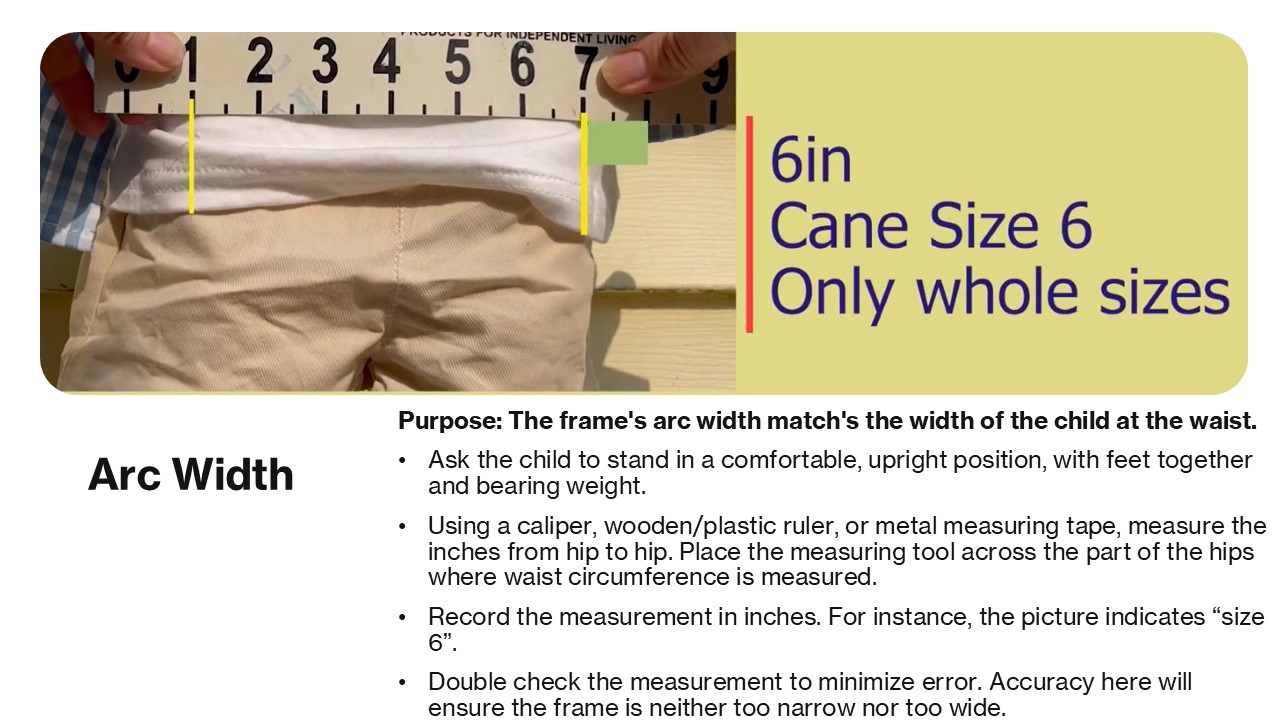
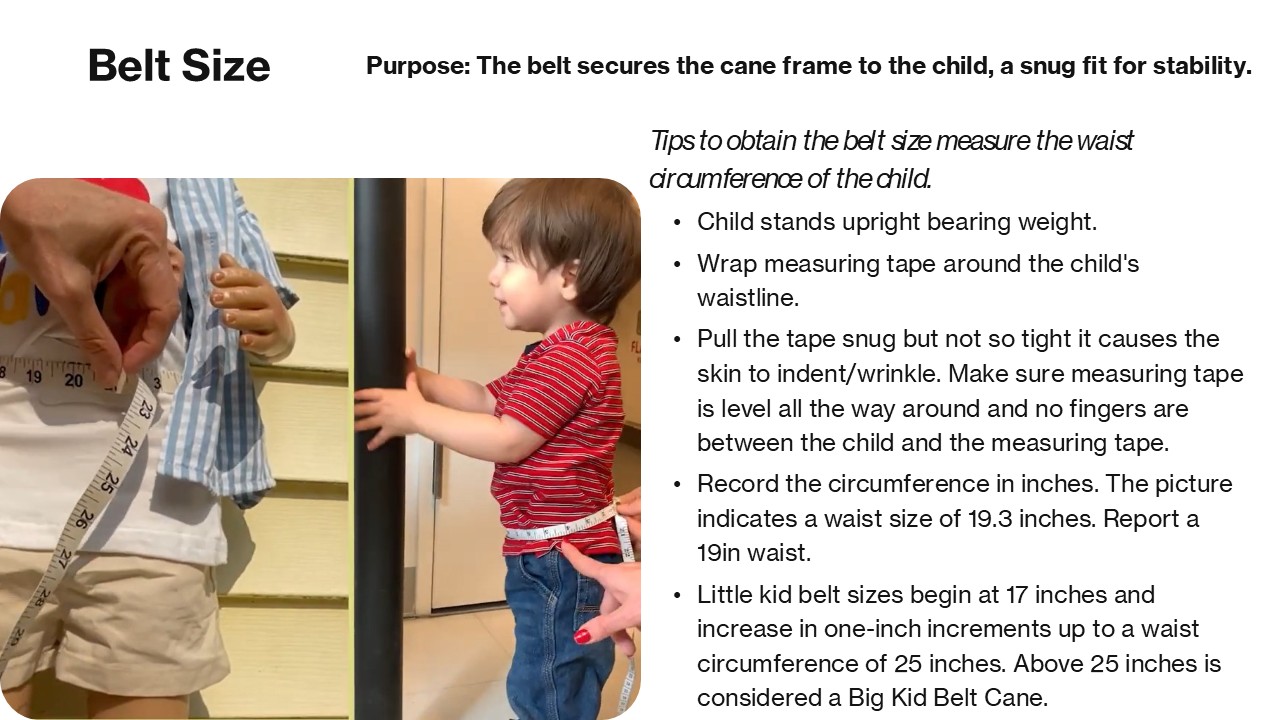
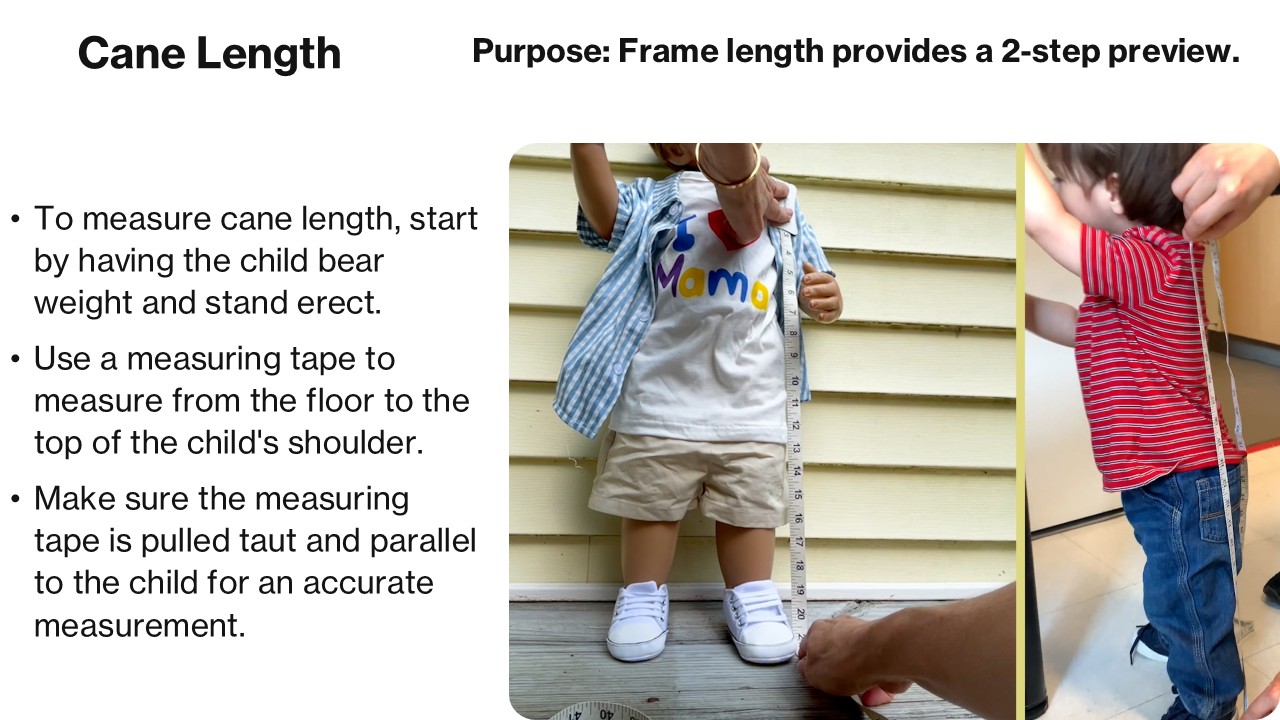
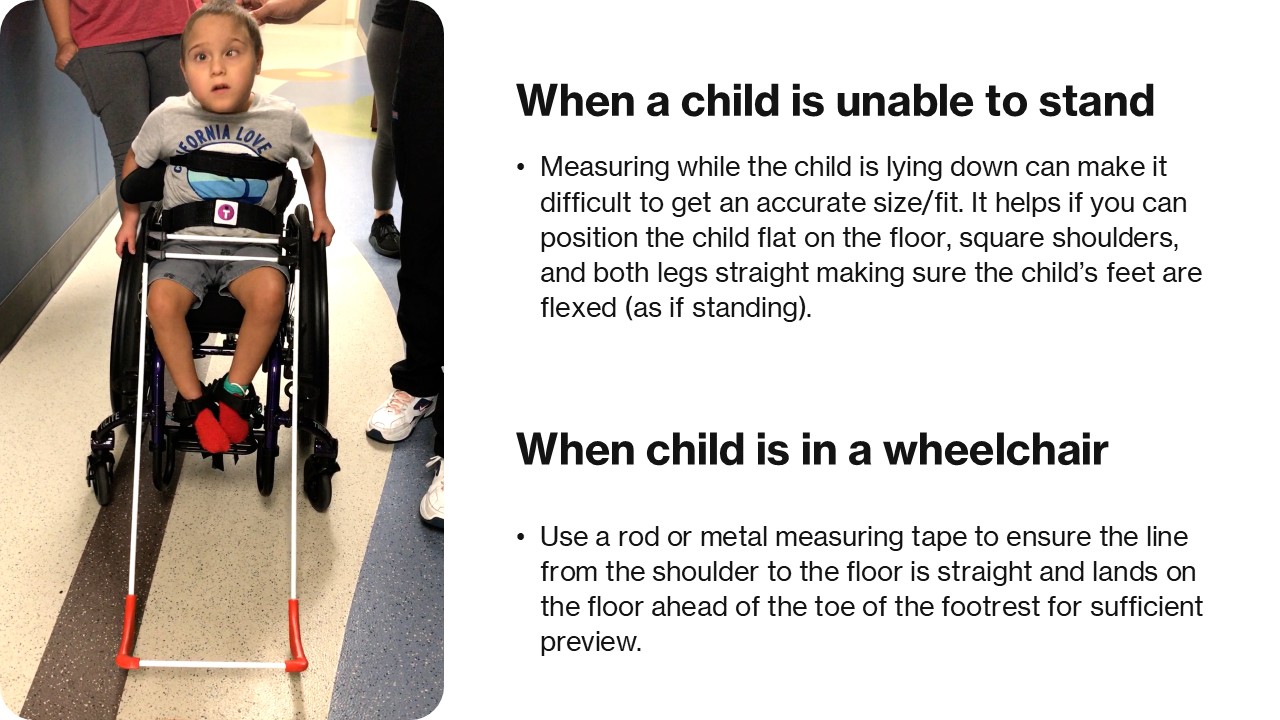
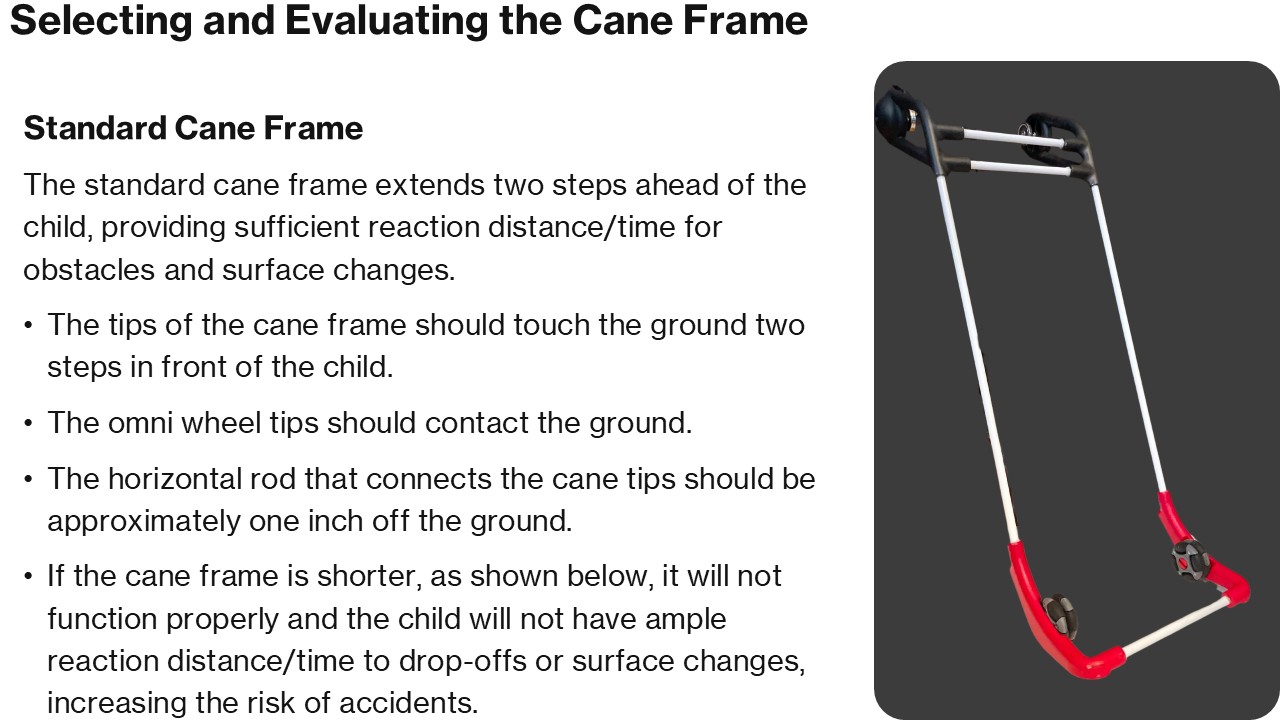
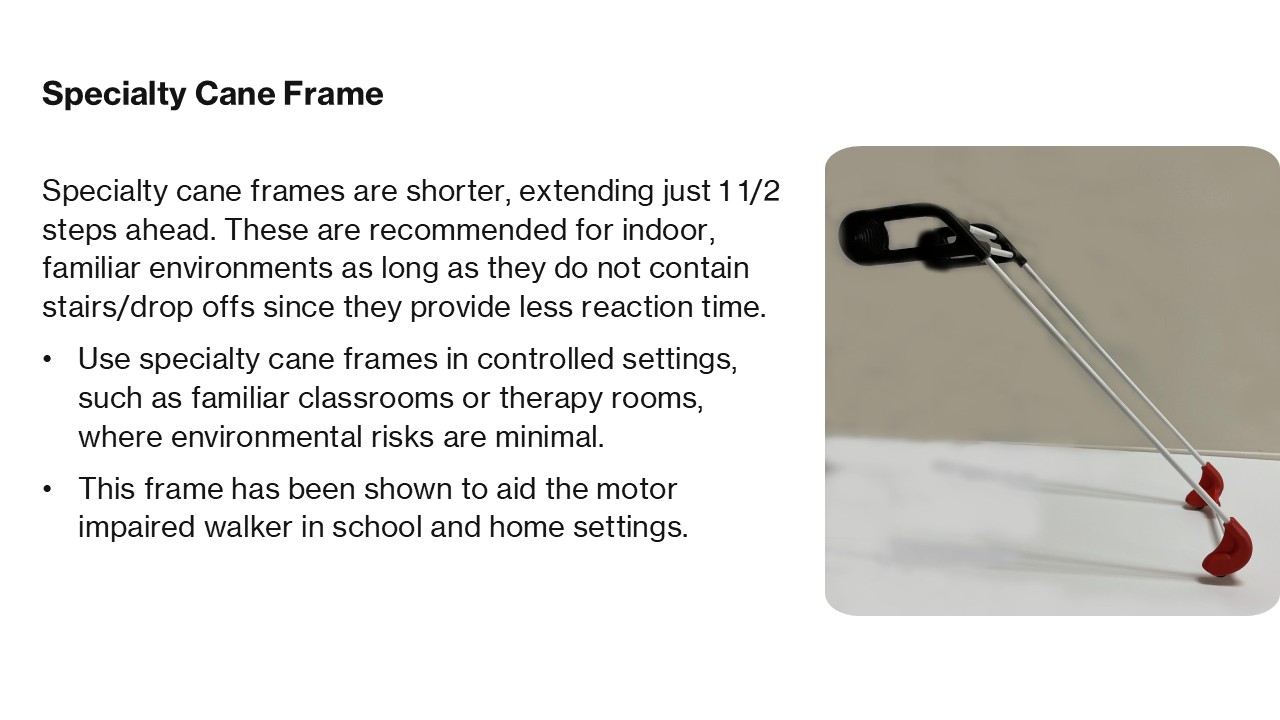
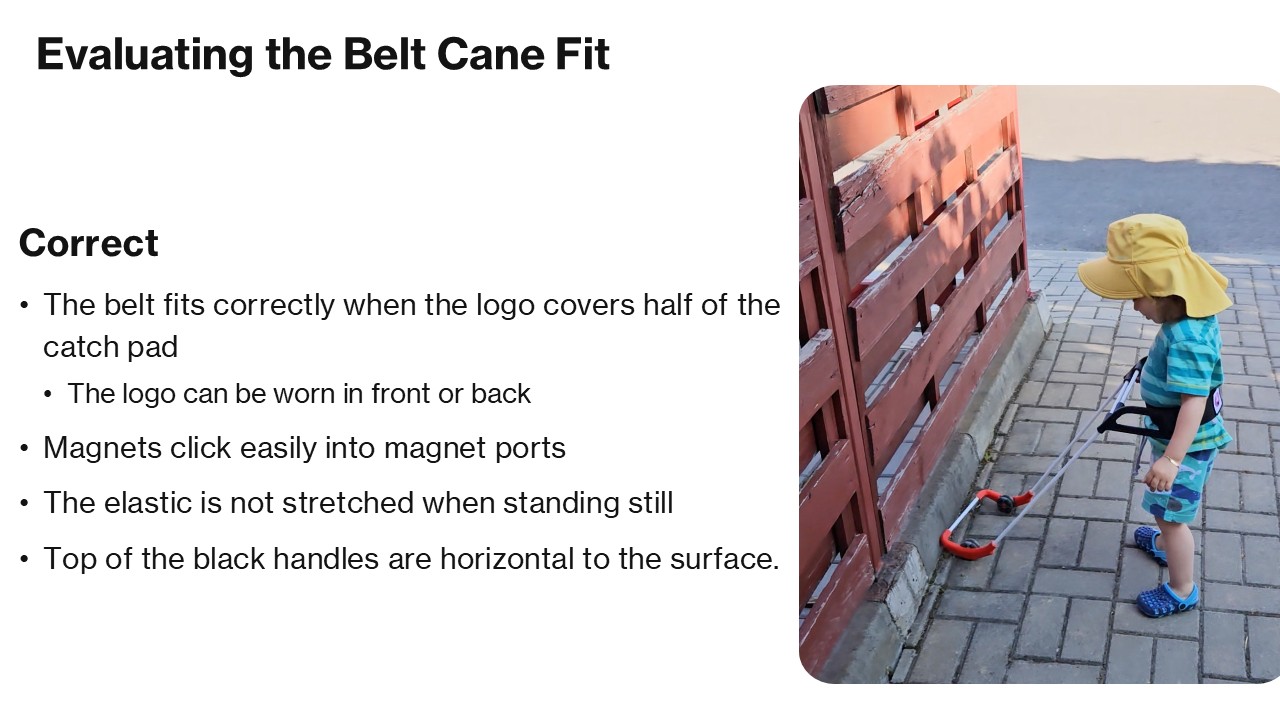
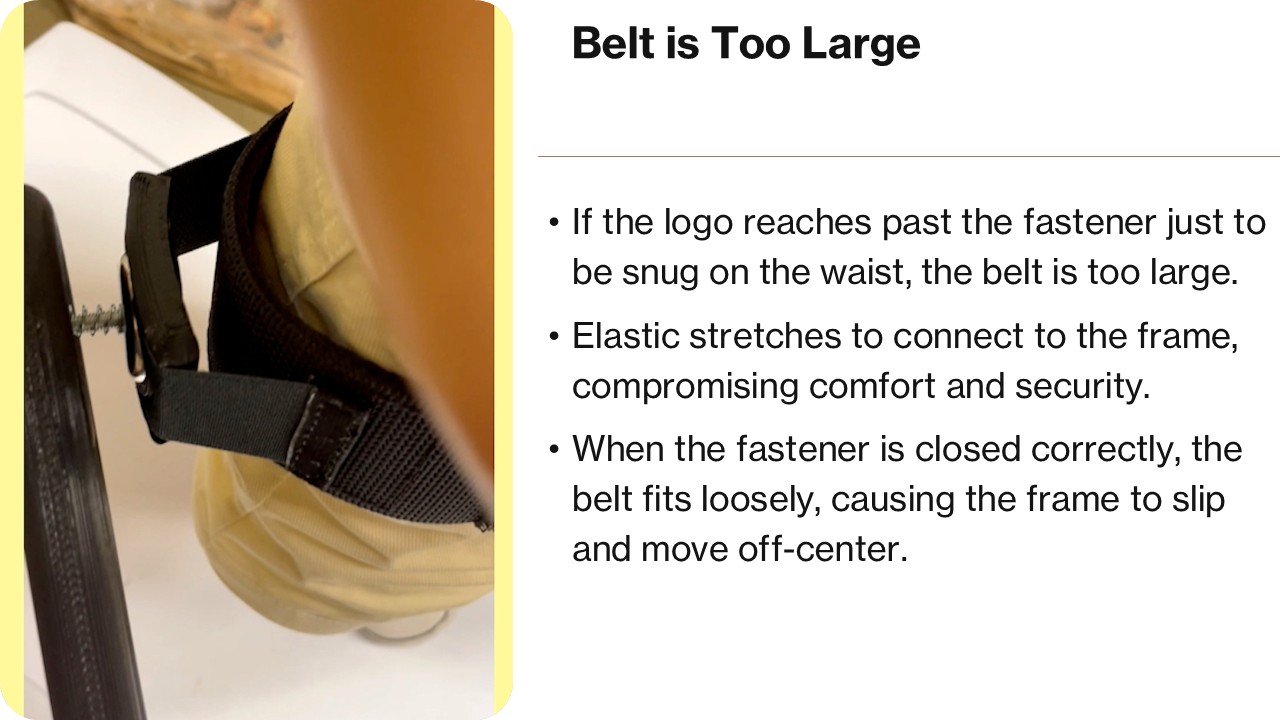
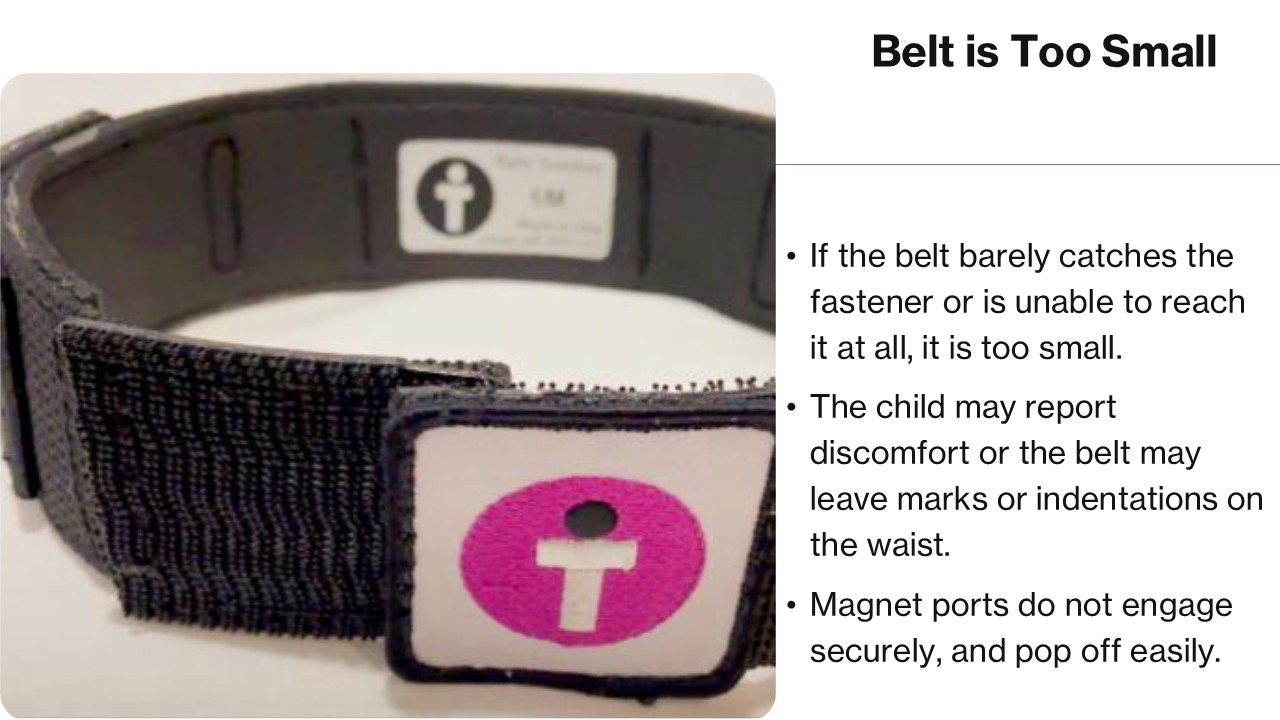
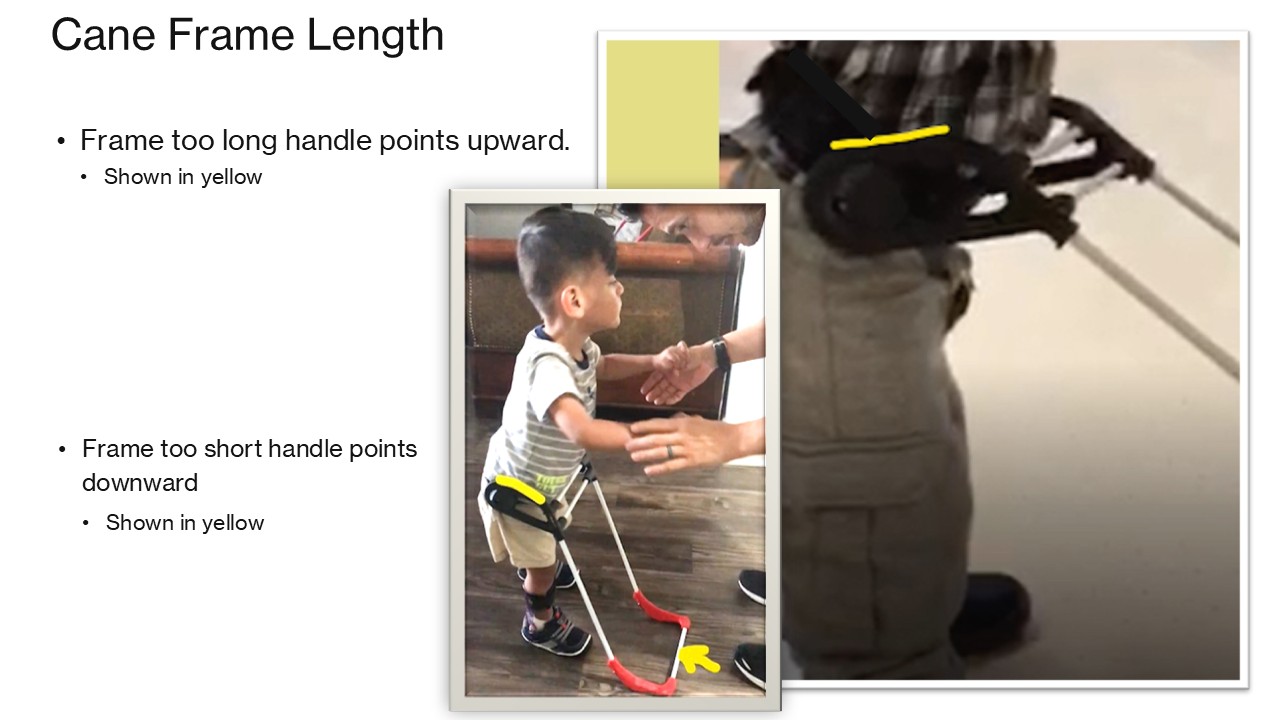
Children with an MVI/B need two-steps of warning and the correct fit ensures best outcome.

5-year-old girl in a gait trainer is wearing a specialty frame