Fitting the Pediatric Belt Cane: A Guide for Measuring Children with a Mobility Visual Impairment or Blindness for their Belt Cane
Introduction
The Pediatric Belt Cane is a specialized tool designed to facilitate independent movement by providing consistent tactile feedback about the path ahead. Selecting the correct size and ensuring proper fit is essential to a Belt Cane’s effectiveness. This chapter will guide educators through the process of measuring, selecting, and evaluating the fit of a Pediatric Belt Cane.
Watch How to Fit a Pediatric Belt Cane
Measuring for the Pediatric Belt Cane
For optimum benefit, the fit of the Pediatric Belt Cane needs to be exact on day one. For best outcomes, make sure the child is standing up and bearing weight when all three measurements are being taken.
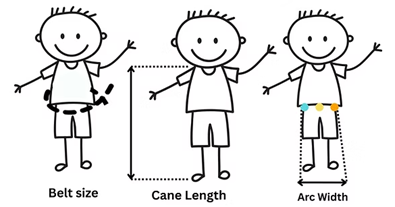
The belt size and cane arc width are both measurements taken at the child's waist. The Belt Cane needs to fit correctly on day one.
The frame length is measured to the child's shoulder.
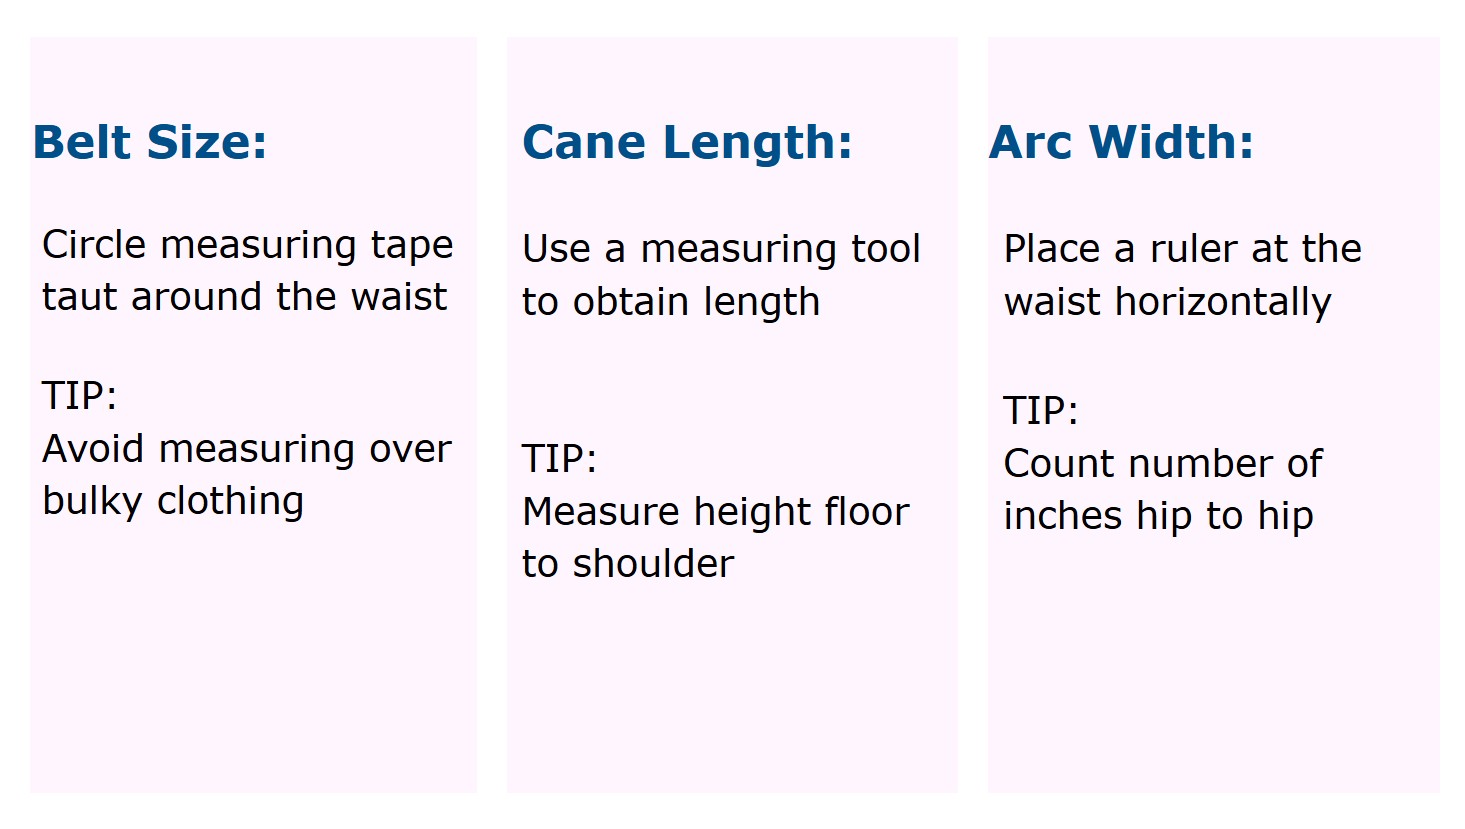
1.1 Arc Width
Purpose: The frame's arc width match's the width of the child at the waist.
Ask the child to stand in a comfortable, upright position, with feet together and bearing weight.
Using a caliper, wooden/plastic ruler, or metal measuring tape, measure the inches from hip to hip. Place the measuring tool across the part of the hips where waist circumference is measured.
Record the measurement in inches. For instance, the picture indicates “size 6”.
Double check the measurement to minimize error. Accuracy here will ensure the frame is neither too narrow nor too wide.

1.2 Belt Size
Purpose: The belt secures the cane frame to the child, a snug fit is essential for both stability and comfort.
To obtain the belt size measure the waist circumference of the child.
Tips:
Ask the child to stand in a comfortable, upright position, with feet together and bearing weight.
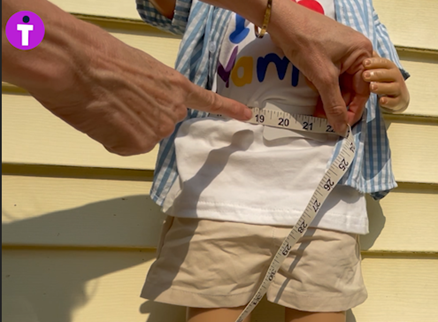
Using a measuring tape wrap it around the child's waistline.
Pull the tape snug but not so tight it causes the skin to indent/wrinkle. Make sure measuring tape is level all the way around and no fingers are between the child and the measuring tape.
3. Record the circumference in inches. For instance, the picture indicates a waist size of 19.3 inches. Report a 19in waist circumference.
-
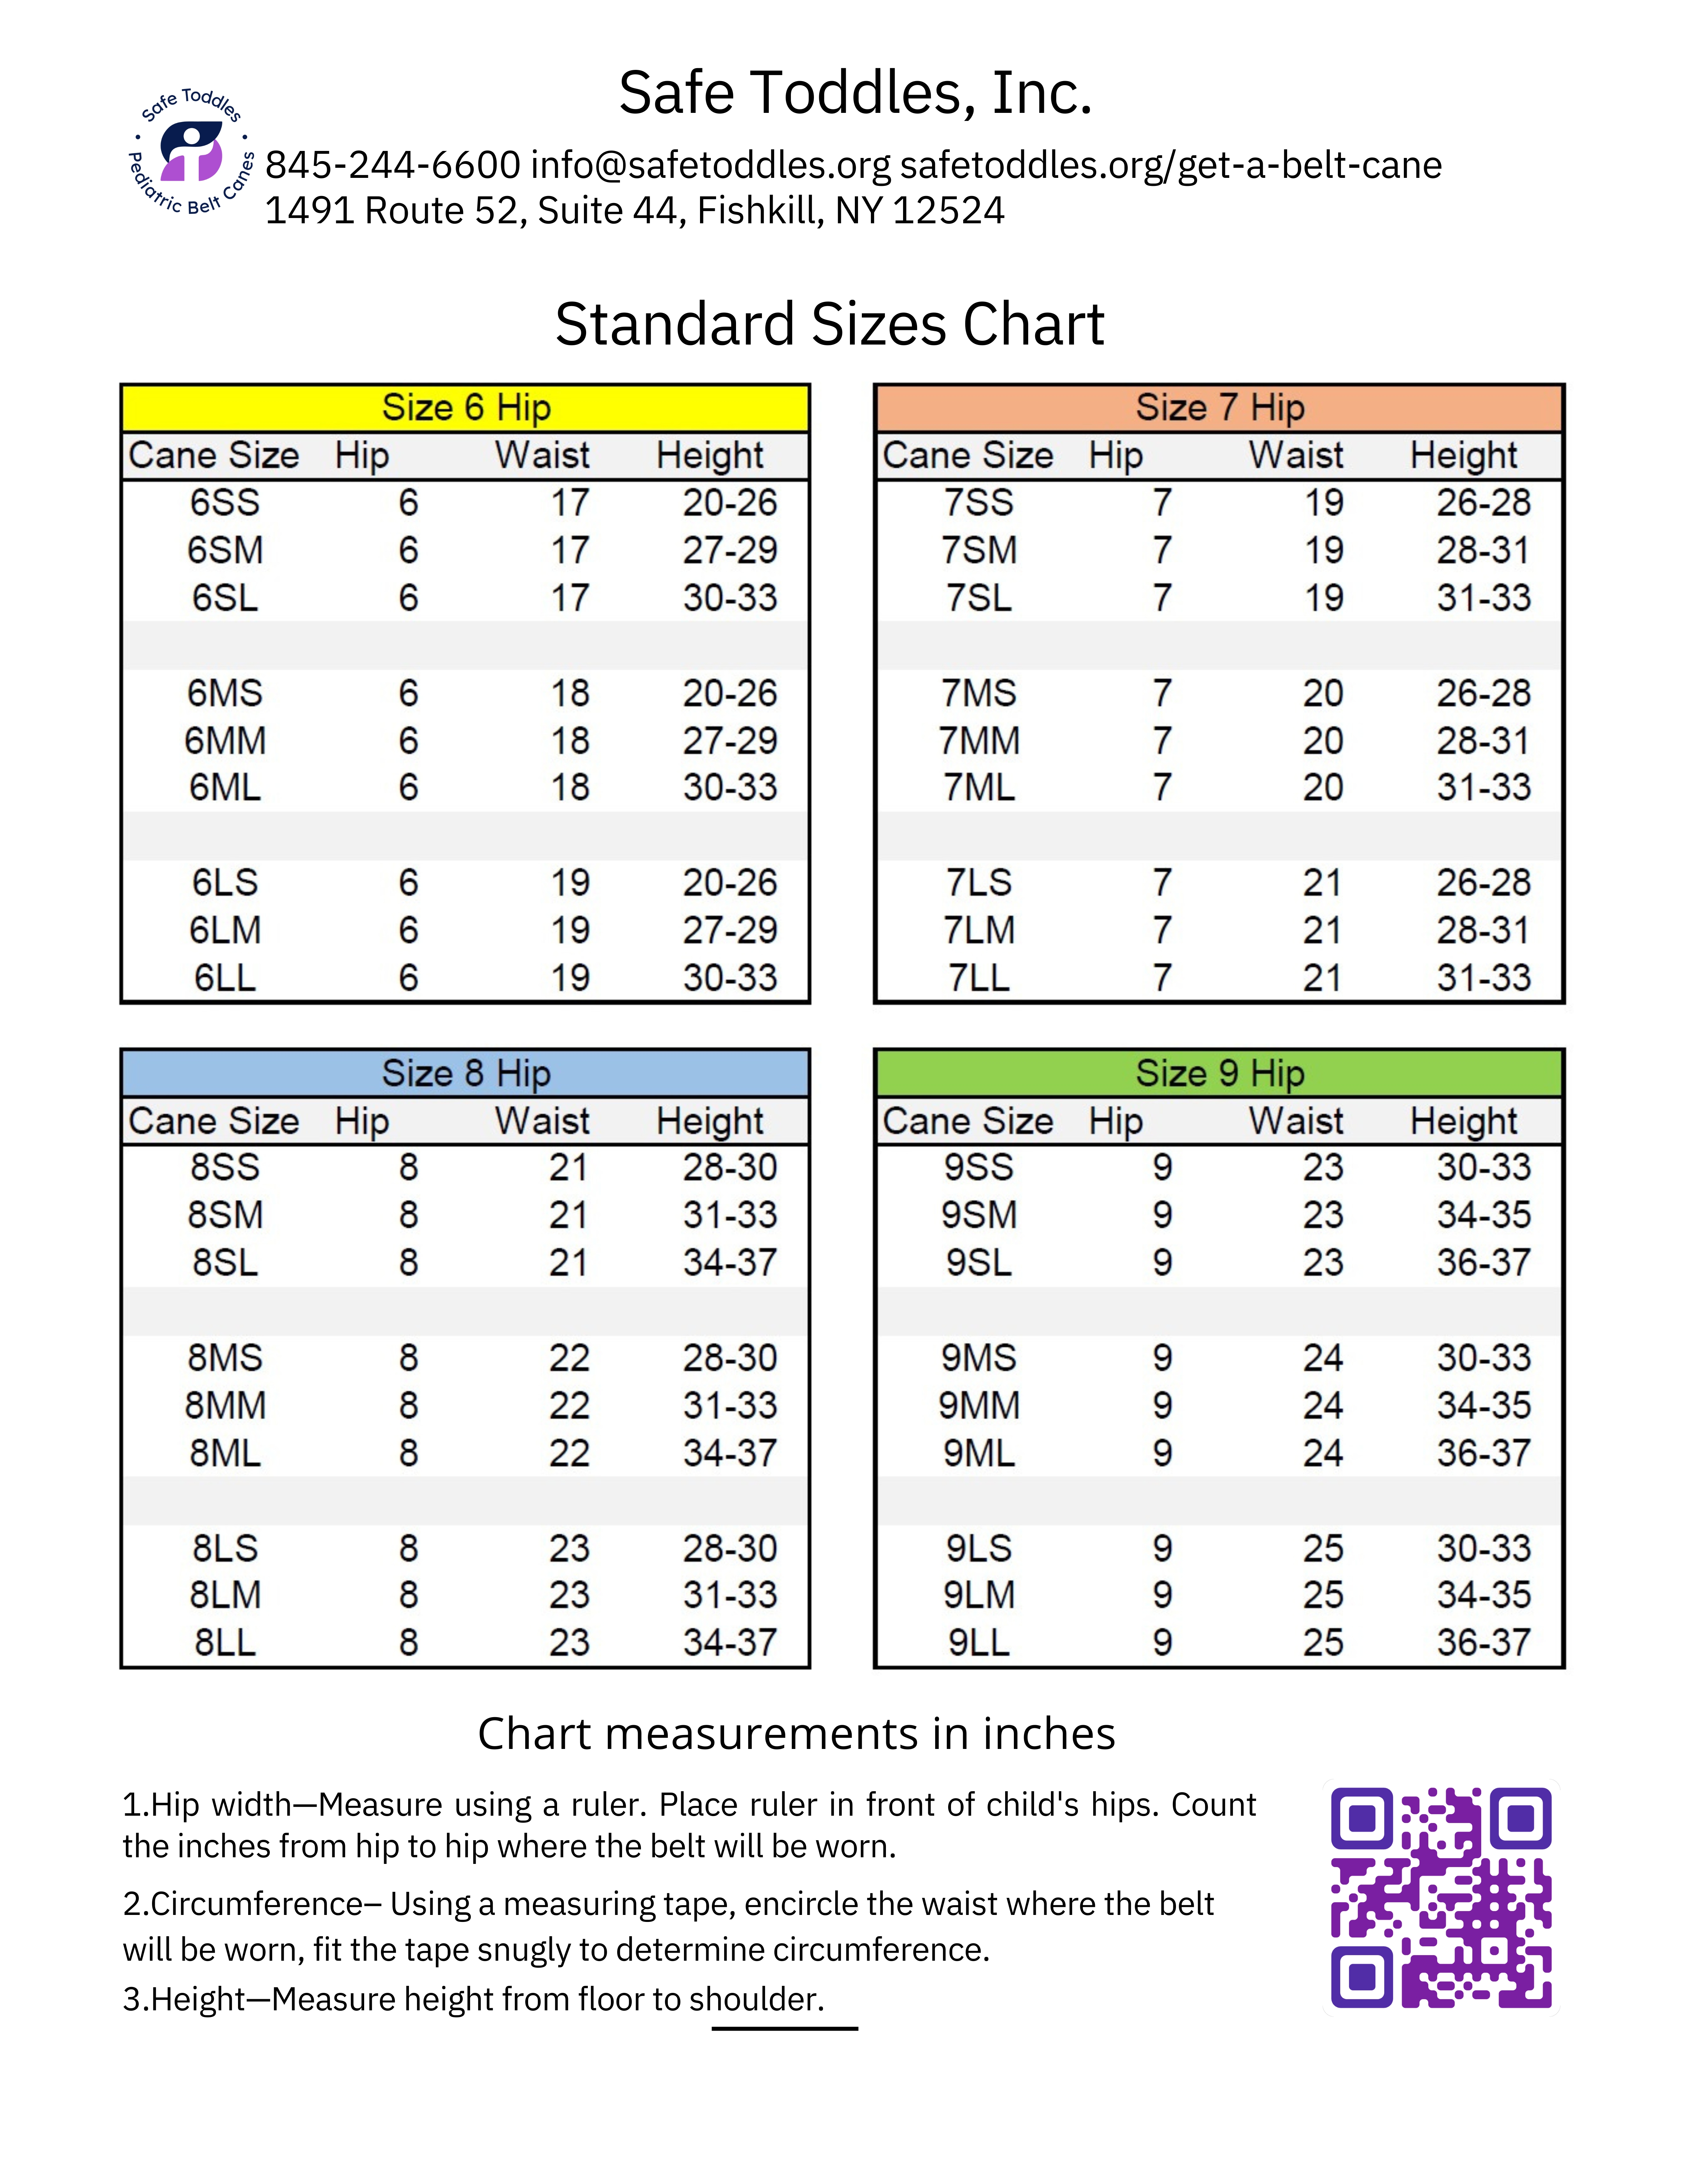
Little kid belt sizes begin at 17 inches and increase in one-inch increments up to a waist circumference of 25 inches. Above 25 inches is considered a Big Kid Belt Cane.
1.3 Cane Length
Purpose: Correct frame length provides a 2-step preview.
To measure cane length, start by having the child bear weight and stand erect.
Use a measuring tape to measure from the floor to the top of the child's shoulder.
Make sure the measuring tape is pulled taut and parallel to the child for an accurate measurement.


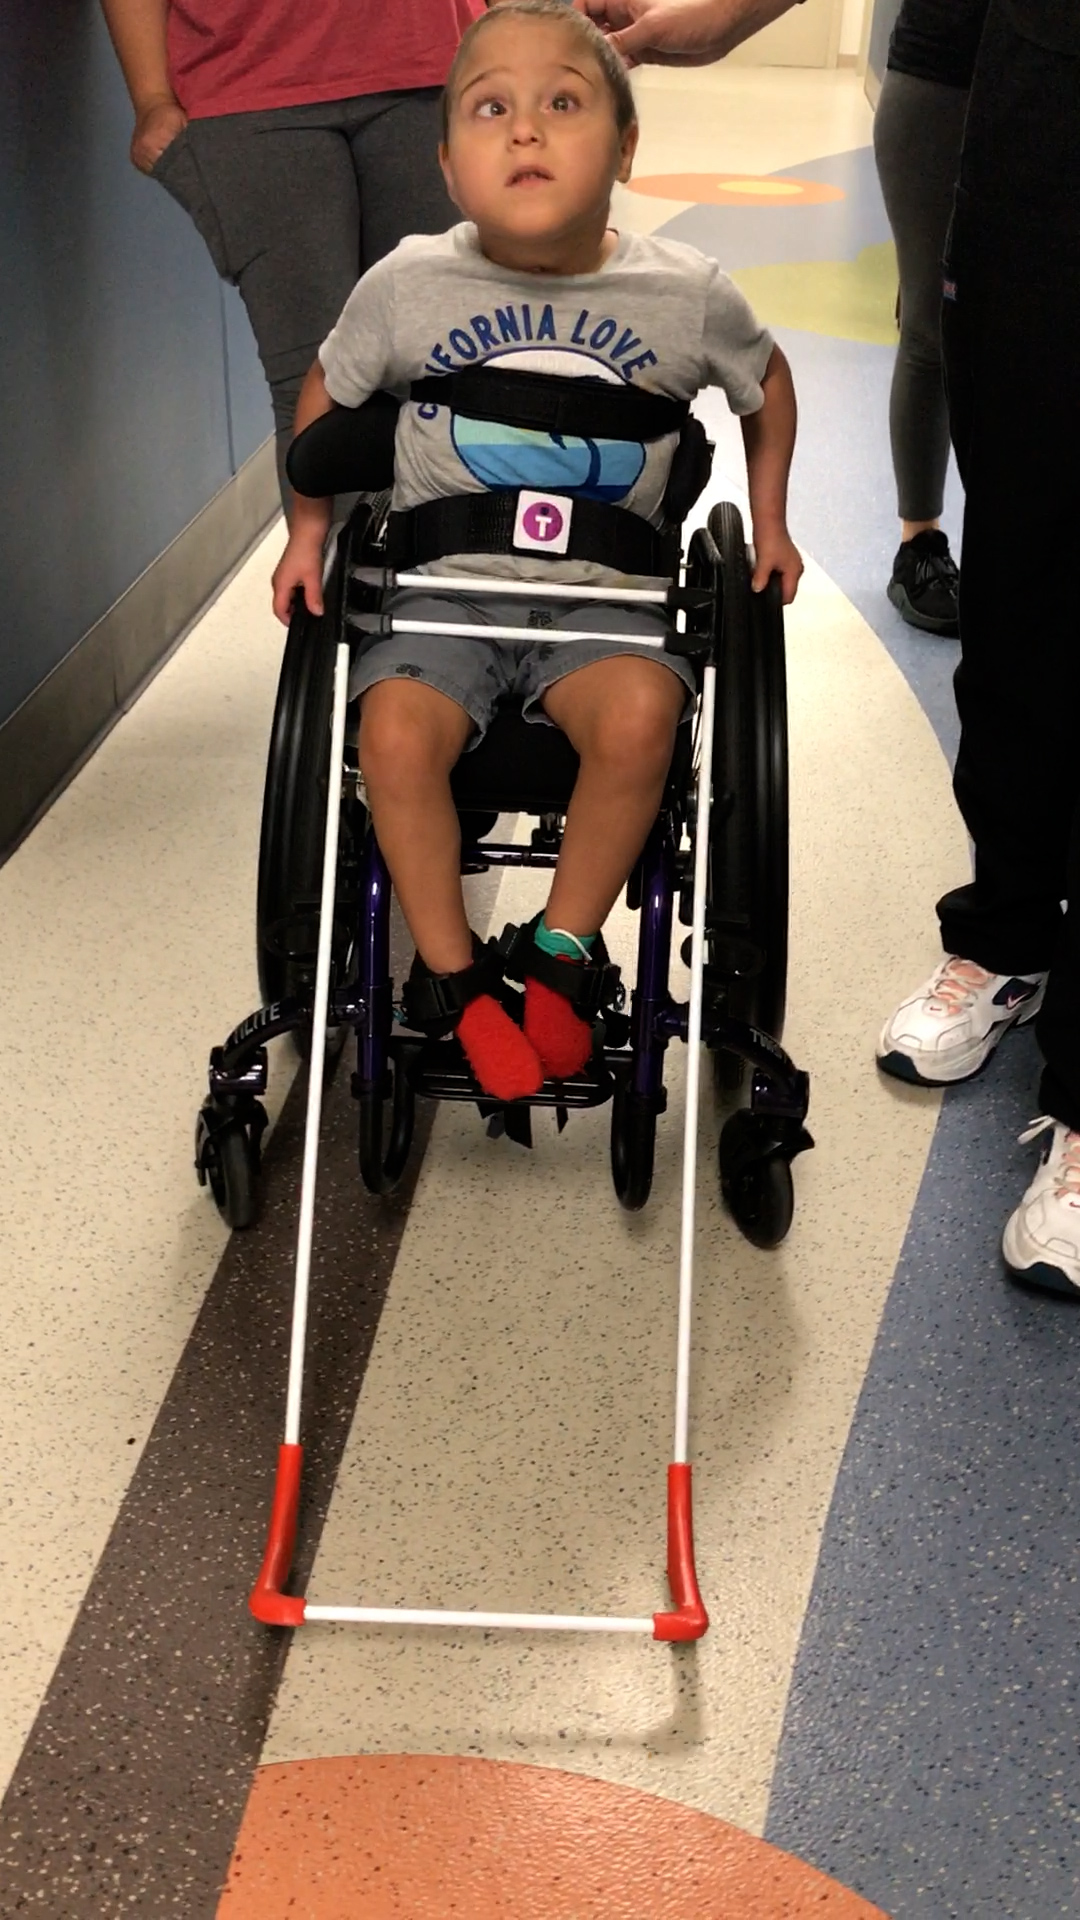
When a child is unable to stand
Measuring while the child is lying down can make it difficult to get an accurate size/fit. It helps if you are able to position the child flat on the floor, square shoulders, and both legs straight with feet flexed.
When child is in a wheelchair use a rod or metal measuring tape to ensure the line from the shoulder to the floor is straight and lands on the floor just ahead of the toe of the foot rest.
Pediatric Belt Cane fit is essential for proper function.
The belt should be snug around the waist, and the frame width must match the belt size (e.g., a size 6 cane frame won’t fit a size 7 belt). The properly sized Belt Cane frame will extend two steps ahead of the user. An oversized belt causes the frame to shift easily, and too short of a frame length makes gliding across the surface ahead of the child difficult.
Evaluating the Belt Fit
2.1 Orientation and Placement
While the belt is designed to be worn with the logo in front, individual needs may lead to the alternative position of wearing the logo in back, either to ease the process of putting it on or to prevent tampering by the child. Regardless of orientation, the most crucial factor is the security and comfort of the fit.

2.2 Signs of Correct Belt Size
An appropriately fitted belt will show these characteristics:
The belt fastens midway on the rough part of the fastener—neither at the very edge nor too far past the midpoint.
When connecting, the belt should easily snap into the magnet ports with a clear, solid click, signifying secure magnet engagement.
Once connected, the belt remains attached to the frame during wear and movement; it should not easily disengage from the magnet ports with regular use.
The magnets must fit snugly within the ports. Gentle tugging back and forth should not release the magnets from their ports.
Elastic connecting the belt to the magnet should be relaxed when standing still; rather, it should rest comfortably without tension.
2.3 Signs the Belt is Too Small
If the belt barely catches the fastener or is unable to reach it at all, it is too small.
The child may report discomfort or the belt may leave marks or indentations on the waist.
Magnet ports do not engage securely, and opens during typical use.

2.4 Signs the Belt is Too Large
If the logo reaches past the fastener just to be snug on the waist, the belt is too large.
Elastic stretches to connect to the frame, compromising comfort and security.
When the fastener is closed correctly, the belt fits loosely, causing the it to slip and turn with typical usage.
Selecting and Evaluating the Cane Frame
3.1 Standard Cane Frame
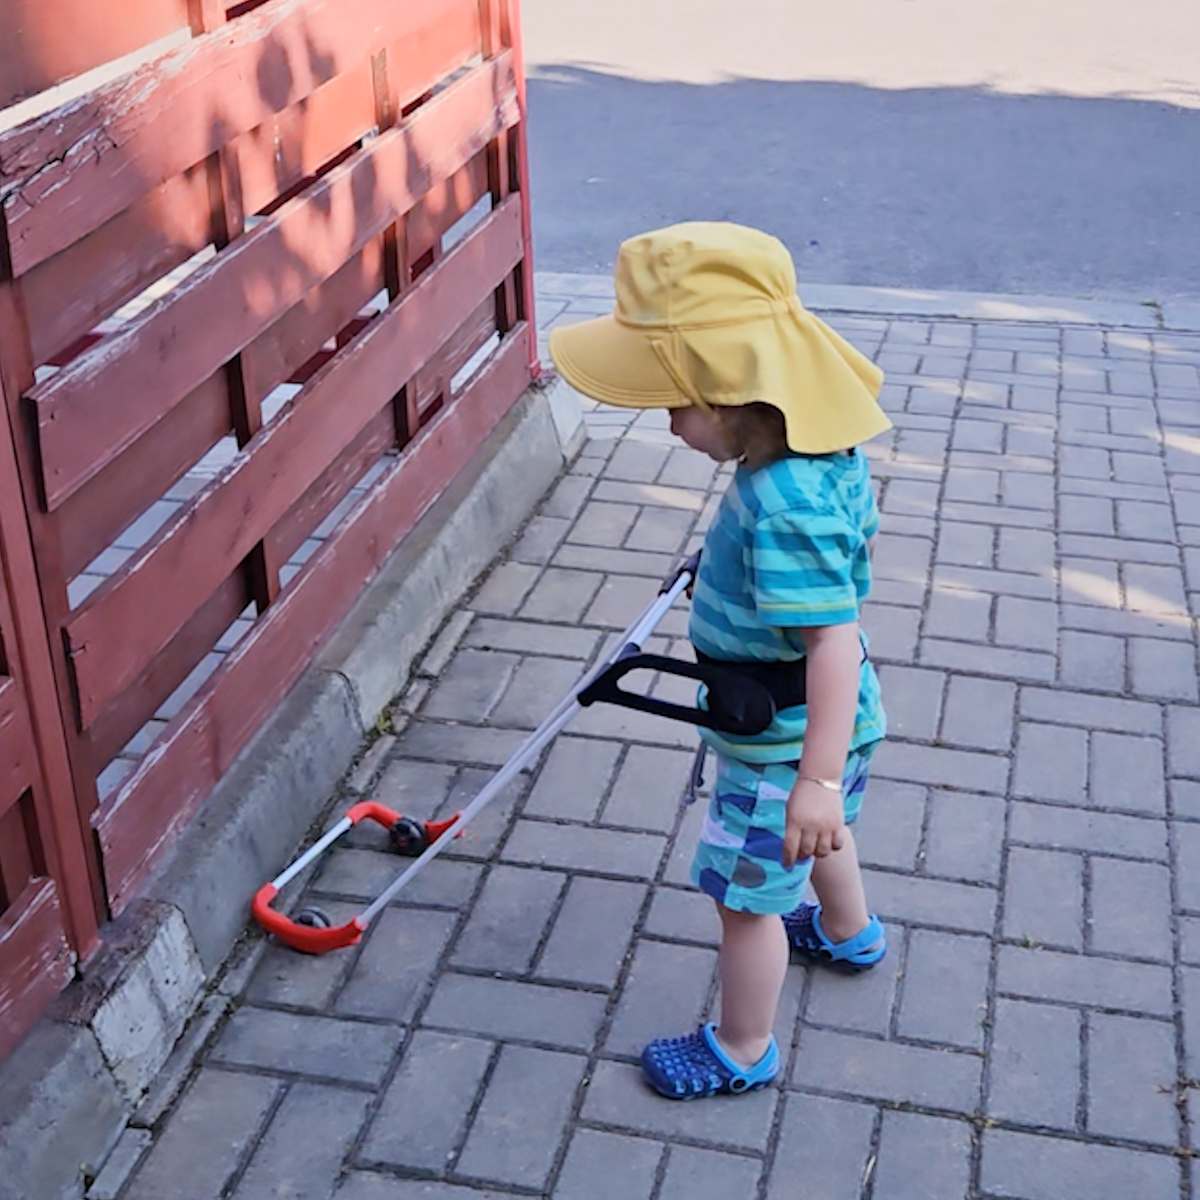
The standard cane frame extends two steps ahead of the child, providing sufficient reaction distance/time for obstacles and surface changes.
The tips of the cane frame should touch the ground two steps in front of the child.
The omni wheel tips should contact the ground.
The horizontal rod that connects the cane tips should be approximately one inch off the ground.
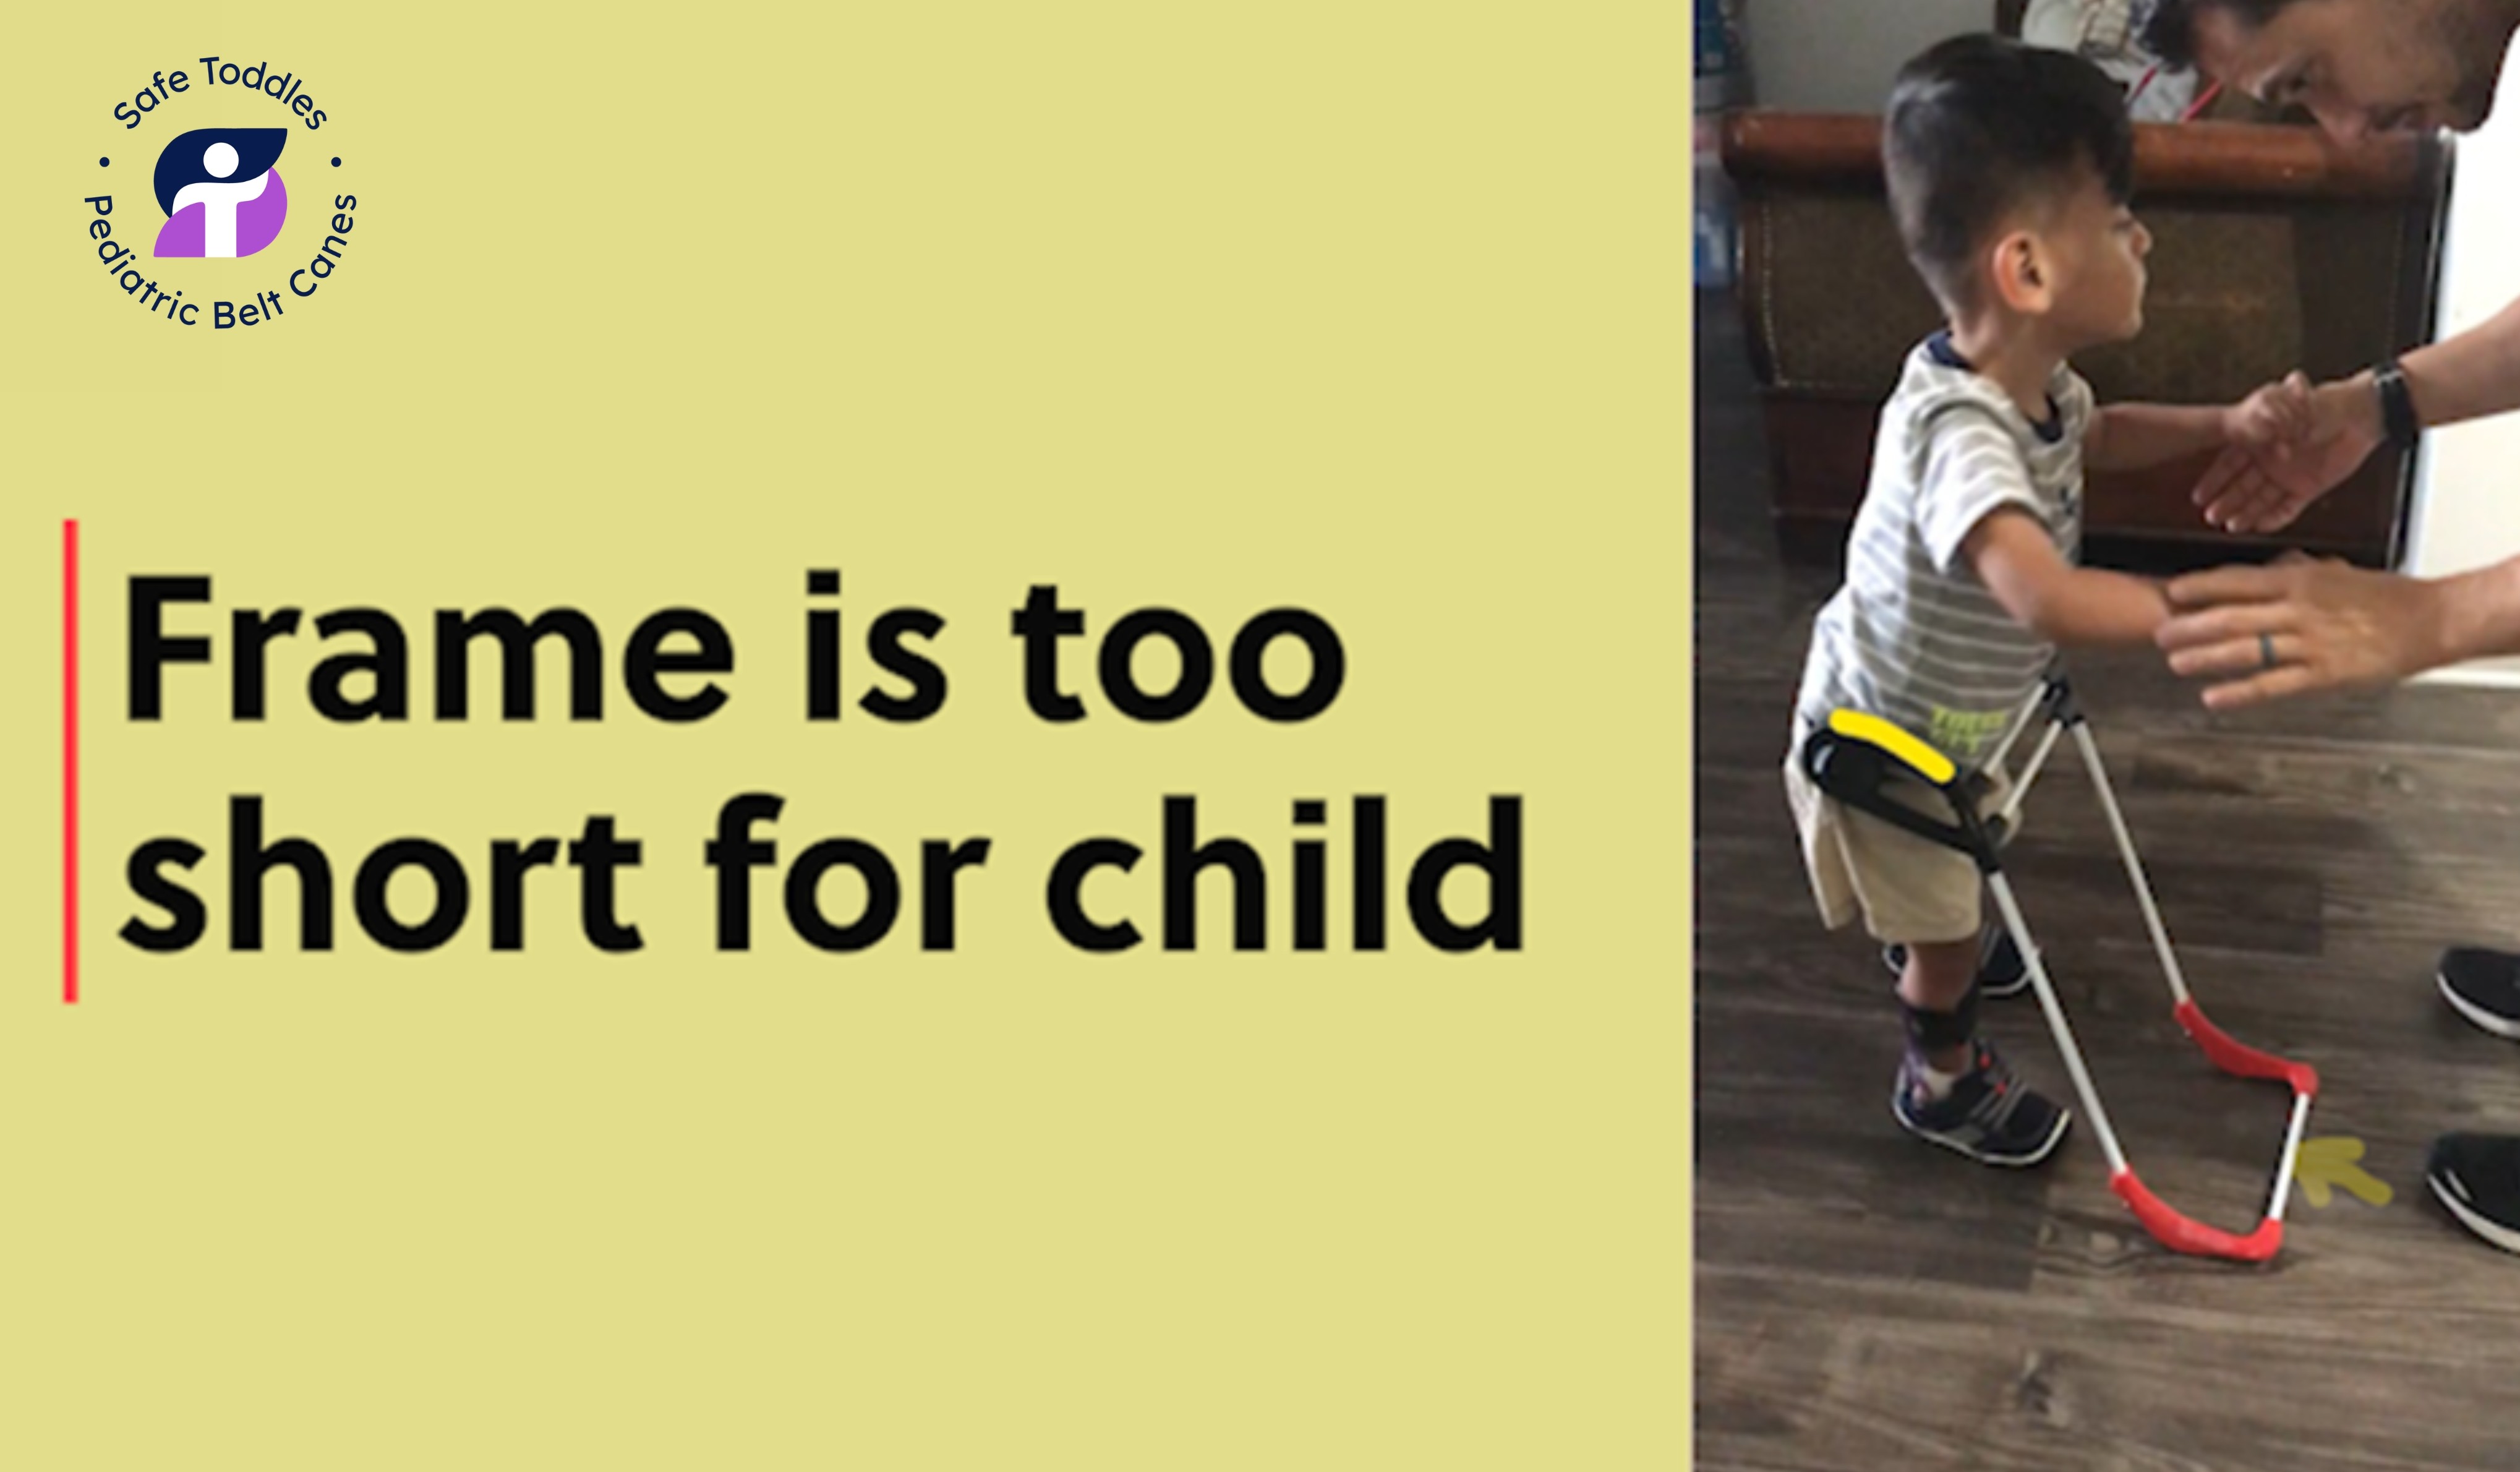
If the cane frame is shorter, as shown below, it will not function properly and the child will not have ample reaction distance/time to drop-offs or surface changes, increasing the risk of accidents.
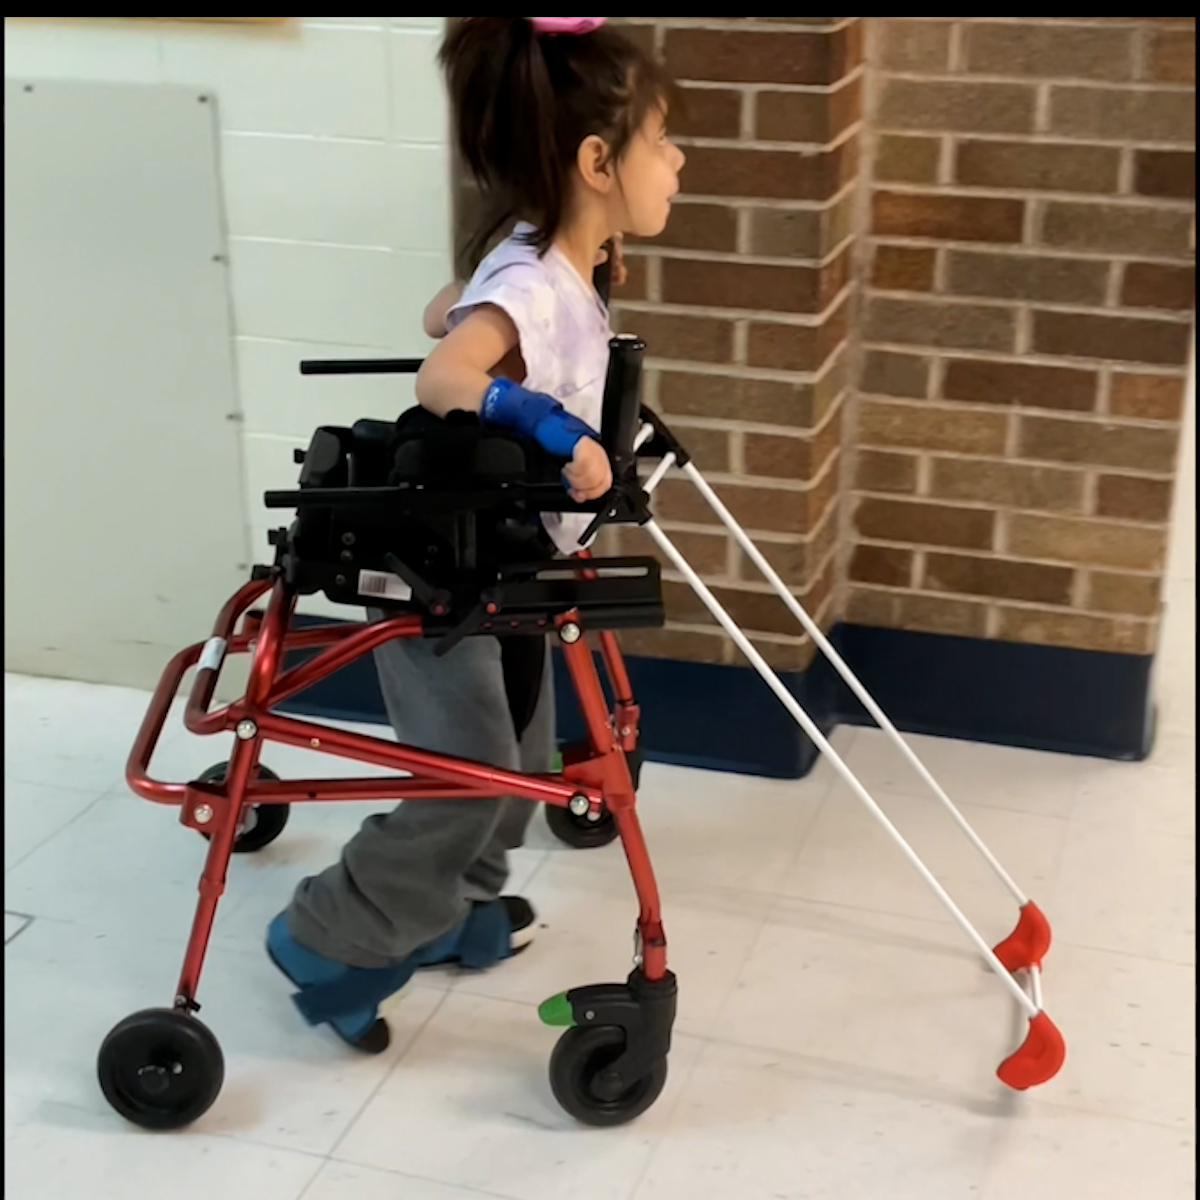
3.2 Specialty Cane Frame
Specialty cane frames are shorter, extending just 1 1/2 steps ahead. These are recommended for indoor, familiar environments as long as they do not contain stairs/drop offs since they provide less reaction time.
Use specialty cane frames in controlled settings, such as familiar classrooms or therapy rooms, where environmental risks are minimal.
This frame has been shown to aid the motor impaired walker in school and home settings. They do not function well outside on rough surfaces or grass.
Belt and Frame Connection
The integrity of the belt-frame connection is crucial for effectiveness and safety.
Check that all magnets are securely inserted in their ports and that the belt remains attached during movement.
Test with gentle force to ensure the magnets do not disengage easily.
When standing still, the elastic connectors should rest without being stretched, indicating proper alignment and fit.
Section 5: Activities for Practicing Fit and Use
5.1 Changing Belt Cane Frames
Practice changing out frames regularly to build proficiency and speed. This can be done in a supervised setting, allowing practitioners and children to become familiar with the mechanics of the device.
Time each cane frame change and strive for improvement.
Discuss cues and strategies for identifying when a cane frame might need to be changed, such as entering a new environment or noticing a decline in tactile feedback.
5.2 Adjusting for Comfort and Fit
It is common for children to reposition the belt above the hips for comfort. In these cases, readjust the belt to fit snugly in the preferred location, ensuring that the connection remains secure and the tactile feedback is uncompromised.
Monitor for signs of discomfort, slippage, or disengagement of the belt from the frame.
Encourage feedback from the child regarding comfort and ease of movement.
5.3 Daily Frame Checks
When the cane frame is in use, perform regular checks for optimal performance:
Verify that the omni wheel tips are contacting the floor.
The front of the cane tips should curve upwards, ensuring proper scanning of the path ahead and maximizing environmental awareness.
Address any issues promptly, such as tips not making contact or bearings becoming stuck.
6: Evaluating Fit Over Time
Children grow quickly, and regular evaluations of both belt and frame fit are essential for continued safety and effectiveness.
Schedule periodic reassessments of hip width, waist circumference, and shoulder height (at minimum every six months, or sooner if rapid growth is observed).
Adjust sizing and replace equipment as needed to ensure continued alignment of the device with the child’s measurements.
Solicit observations from parents, educators, and the child regarding any changes in movement, comfort, or the effectiveness of the Pediatric Belt Cane.
Conclusion
Selecting the correct size and evaluating the fit of the Pediatric Belt Cane is a multifaceted process that requires careful measurement, observation, and ongoing assessment. By adhering to the guidelines detailed in this chapter, practitioners and caregivers can ensure that children with a mobility visual impairment or blindness are equipped with a properly fitted device that promotes independence, safety, and confidence in movement. Regular communication, attention to comfort, and responsiveness to the child’s evolving needs are essential for maximizing the benefits of the Pediatric Belt Cane.
Appendix A
Current Sizes Charts
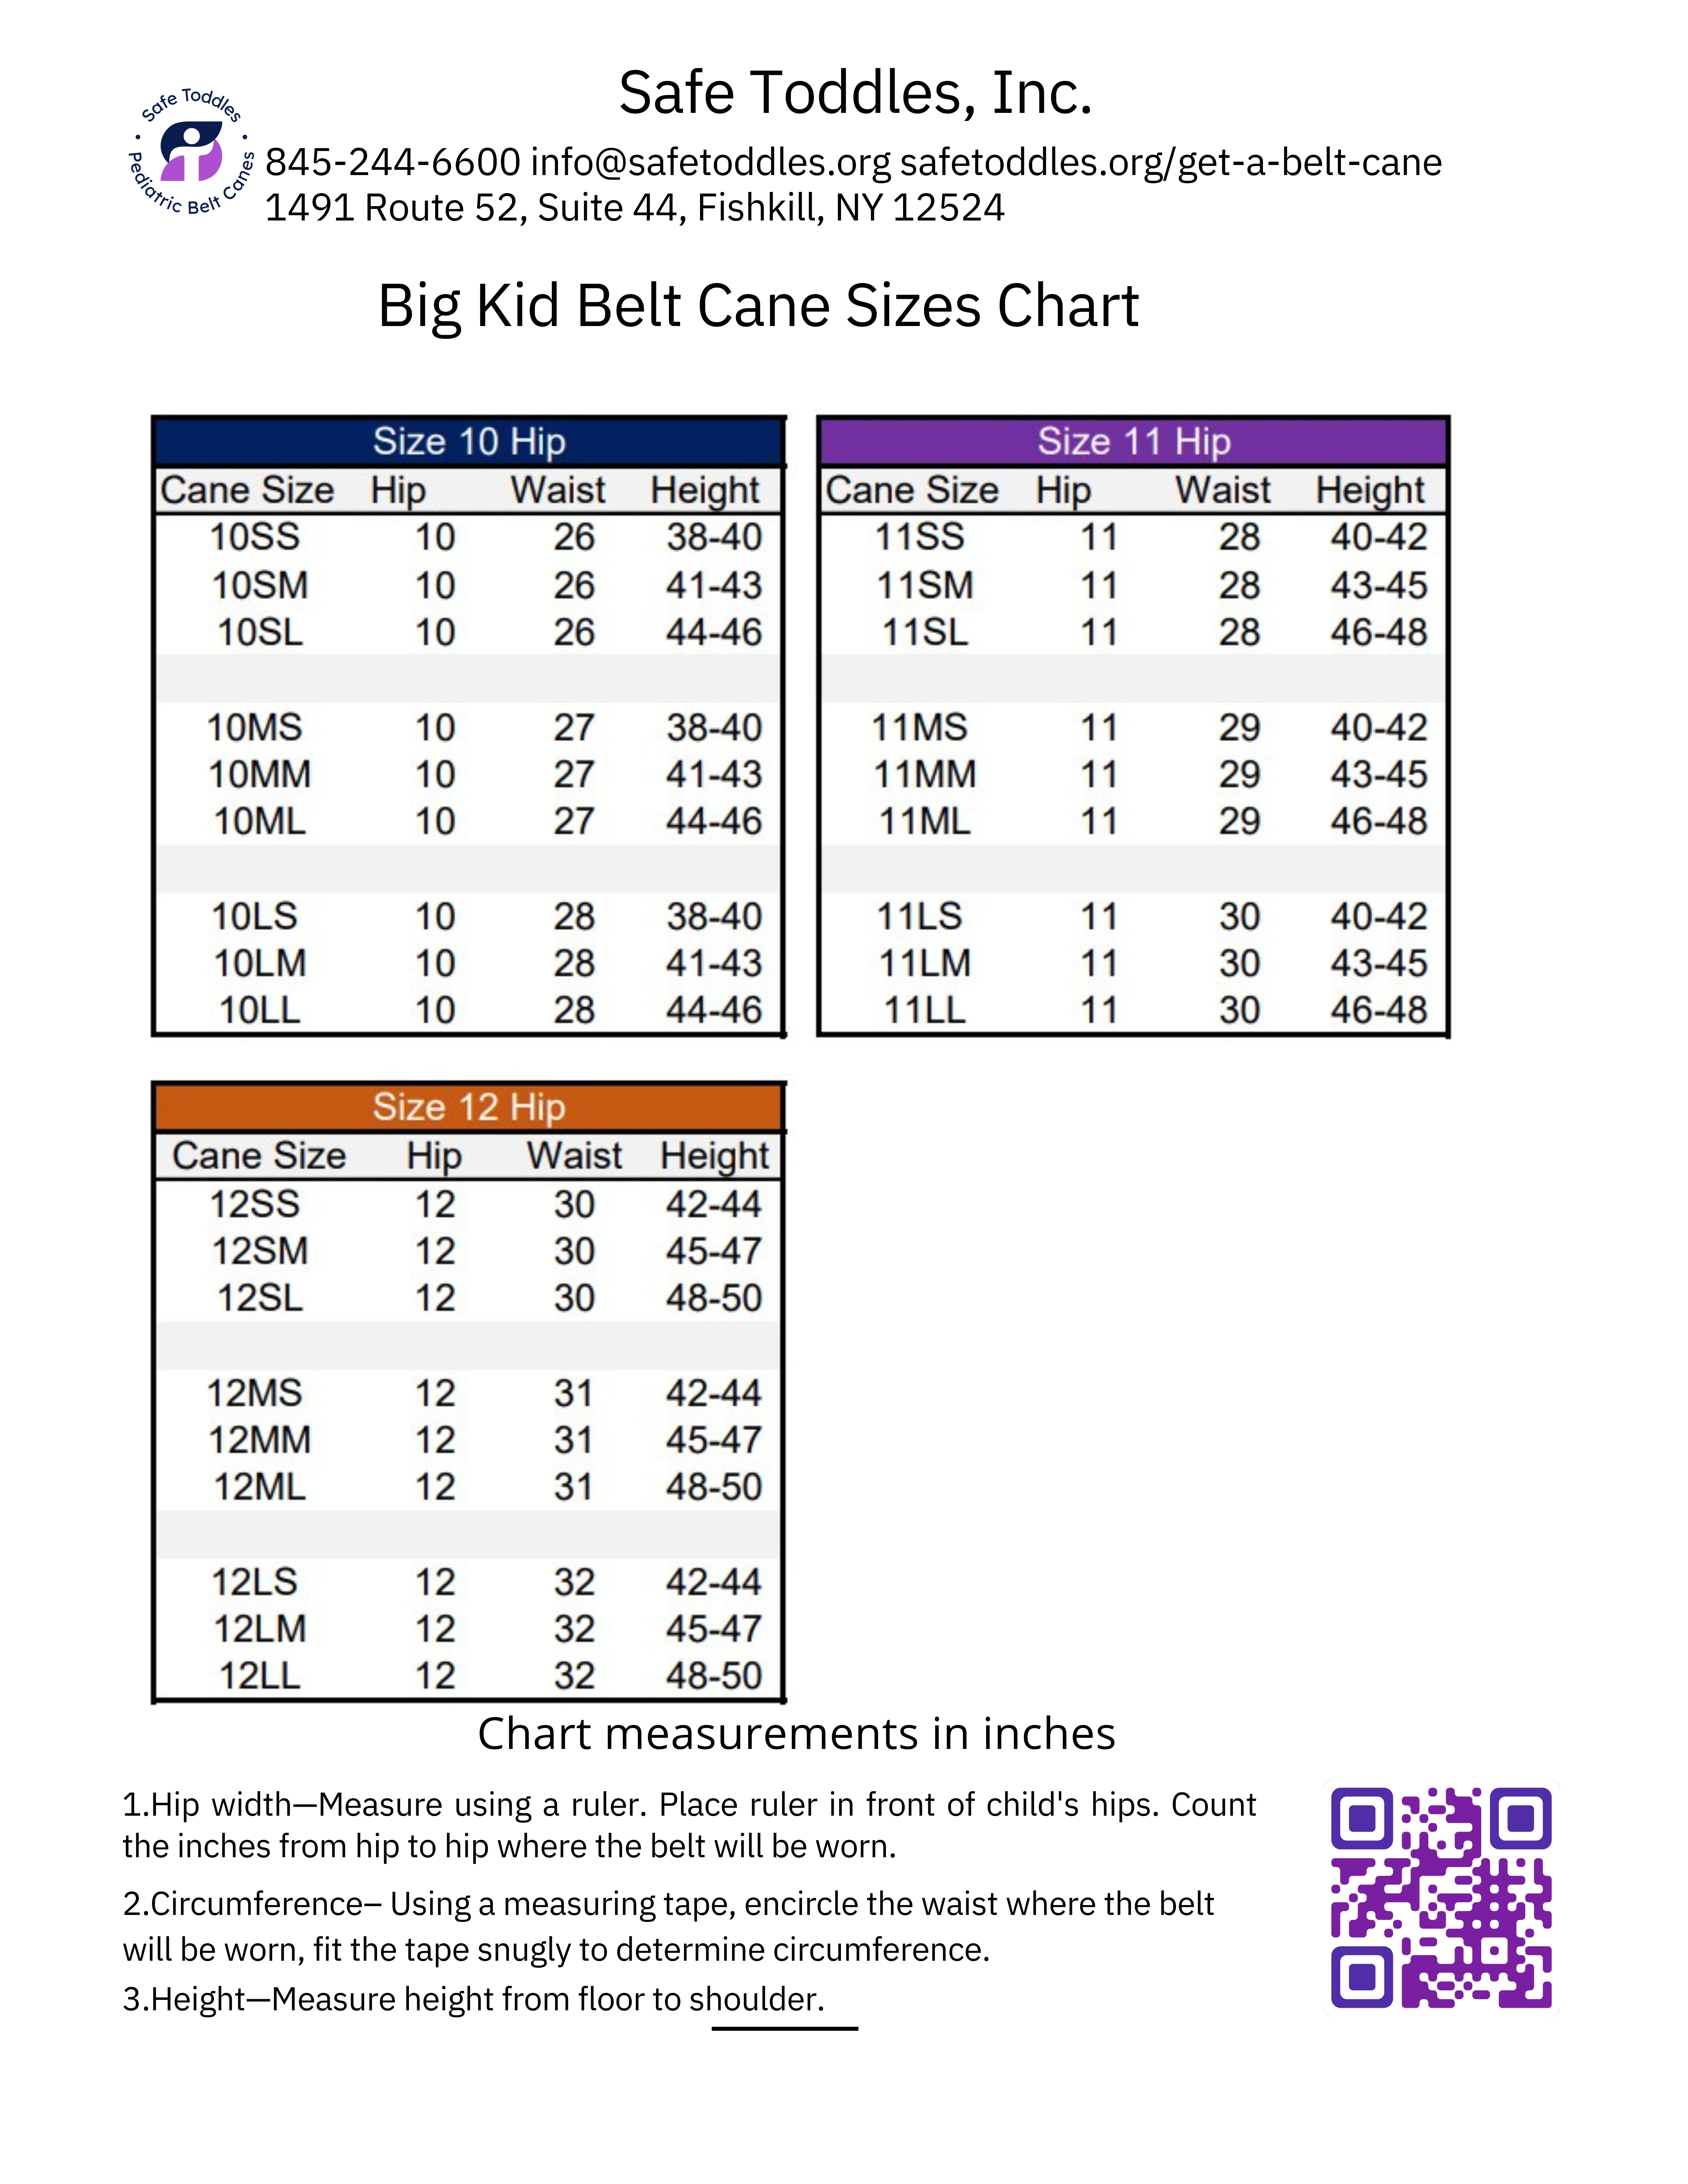
Compile measurements and consult our standard sizes chart to select the correct cane frame and belt for the child. Always cross-reference the hip width, waist circumference, and shoulder height with recommended sizes.
Little Kid Belt Cane Sizes
Big Kid Belt Cane Sizes